Installing ESXi using PXE boot from windows

 vSphere Auto deploy is used in production environment in large enterprises. But you need to purchase a license to use this, which is not viable small business or test environments. 

     There are plenty of commercial softwares provides PXE (Preboot Execution Environment) boot option. In this post we are going to look at a free software, which will help you to network boot/ PXE boot install an ESXi vSphere server. 


In this post we will be using "SERVA" server software to set up PXE boot environment.  


Serva is an Automated PXE Server application supports following features

•   HTTP server

•   FTP server

•   TFTP server

•   TFTP client

•   DHCP server

•   proxyDHCP server 

•   BINL server 

•   DNS server

•   SNTP server

•   SYSLOG server


Serva provides free community edition with few limitations, but this community edition should more than enough for setting up your personal LAB or test environments. 


Here is the comparison of community and professional editions. For more details please visit https://www.vercot.com.


1.Download load Serva Community Edition from below URL:


https://www.vercot.com/~serva/download/Serva_Community_32_64_v3.2.0.zip


2. Extract contents of downloaded zip file to your preferred location. 


  3. Extract contents of ESXi cd/iso contents to a folder.


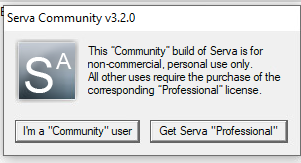
  4. Launch Server64.exe and wait for 7 sec (if you are using community version) and click on "i'm a "Community" user.


5. Make sure you read community license agreement and click OK to agree.


6. Click on Server icon in top left corner of application window for Menu or double click icon to launch setting menu. 


7. From settings Menu select TFTP option, Click on TFTP server. ( If you have multiple IPs configured, select your preferred IP to bind from drop down. ), Now select extract ESXi iso content location as TFTP server root directory. 


8. Move to DHCP tab, If you like to use an existing DHCP server in your setup ( or use home broadband DHCP) select proxy DHCP server option.  Now enter type boot file path ( \EFI\BOOT\BOOTX64.EFI)


Use select DHCP server option, if you don't have exciting DHCP server.  Provide starting ip range for DHCP IP pool and number of IPs in pool size. finally boot file path. 


9. Finally click OK to save configurations. You need to relaunch application each time you make a configuration changes. 


10. We all set to go, connect machine to same network and select network boot. 
you can monitor DHCP ip allocation, TFTP details from log window. 


For more details watch below videos:


Post a Comment

0 Comments